
When it comes to the walls in any home, the damage is inevitable. Whether a tiny blemish from a nail hole or an accidental dent, damage can happen in so many ways. Fortunately, with a few tools and a little bit of patience, these gaping holes in drywall can be restored to their original condition, if not better! If you enjoy trying new DIY projects around your home, then patching and painting drywall is a repair skill that you would certainly enjoy. Below is a step-by-step guide created by Plan It DIY that provides easy details for you to follow! Here’s what you’ll need:
Tools
Scrap Drywall
Drywall Joint Compound
Drywall Saw
Putty Knife
Construction Adhesive
Fiberglass Mesh Tape
Painters Putty
Drywall Screws
Blade Knife
¾” x 2” Furring Strips
Pencil
Trowel
Cordless Drill
Steps
- Clean hole with blade knife. Cut at an angle so the exterior of the hole is bigger than the interior.
- Fill the hole with a painter's putty. Make it level with the wall surface.
- Let it dry. Once dry, lightly sand the area until smooth.
- Spackle over the putty. You may need to repeat this step.
- For medium holes, use a drywall metal patch.
- Sand the surface smooth around the hole.
- Wipe off dust.
- Peel paper backing off the patch. Firmly press the patch in place with mesh facing outward.
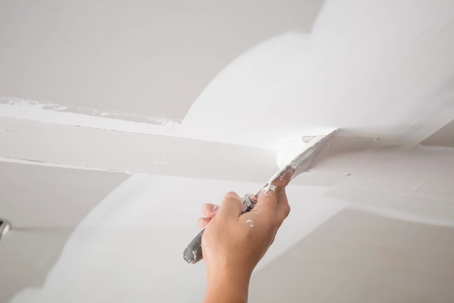
- Spread drywall compound over the patch, feathering out the edges. Smooth out and let dry.
- Gently sand the surface until smooth with the wall. Repeat steps 9 and 10 until the patch can no longer be detected.
- Larger holes need patches made of drywall. Make sure it is the same thickness as the drywall already present.
- Cut a square of drywall slightly larger than the hole. Score one side with a blade knife and snap it apart. Cut the back of the break line.
- Draw an outline of the patch around the hole using a pencil.
- Check for electrical cords and plumbing lines where you plan the cut.
- Use the drywall saw to cut out the drawn area.
- Screw in two wooden boards behind the drywall, one at the top and one at the bottom of the hole. This will keep the patch from falling through.
- Screw the drywall patch to the wooden boards.
- Spread the drywall compound and add mesh.
- Sand area and repeat steps 18 and 19 until the patch is undetectable.
- Paint over once it’s dry.
Of course, every case will vary depending on the size of the hole, type of material, etc., so be sure to check your drywall material and understand the type of wall paint so you are prepared. Some of the common paint finishes that are used include flat, semi-gloss, satin finish, eggshell texture, and more.
The majority of the time, you will not be able to tell if the paint matches the rest of the wall until it is completely dry, so don’t stress if you can’t tell at first. Using the same type of paint finish and texture as the rest of the wall is crucial to have a nice, sleek finish product.
If you are not a fan of DIY projects or you are a homeowner in the Sacramento area looking for house painting and drywall repair services, our team of experts at Good Life Construction is ready to repair your home! With our special services, we hope to improve and restore your home’s charming comfort so it is in perfect condition for you and your loved ones. For more details on our services, give us a call today at (916) 884-6132 or visit our website at www.GoodLifeConstruction.com.